If you use private GitHub repositories and have wondered what is the best way of being able to deploy your repositories to remote compute environments such as AWS, you are not alone. However, there is an elegant and secure solution that doesn’t require you to store your high-level GitHub SSH key in a remote instance.
GitHub has a feature called deploy keys which allows you to add a separate SSH key to your private repository without write access. Furthermore, you can secure this key on your remote compute instance with a password, similar to what you might do on your local machine.
The first step, remote into your remote compute instance ☁️
Run the following command to generate your SSH key
ssh-keygen -t ed25519 -C "your_email@example.com"
If you are only going to use one repository, accept the default name when prompted to “Enter a file in which to save the key”. However, if you want to connect to multiple repositories don’t press Enter to accept the defaults. Instead, enter a name that relates to the corresponding repository you are wanting to connect to.
Use
catto print the public SSH key to the screen and then copy it to your clipboard 📋cat /home/<USER-NAME>/.ssh/<KEY-NAME>.pubGo to your GitHub repository and click Settings.

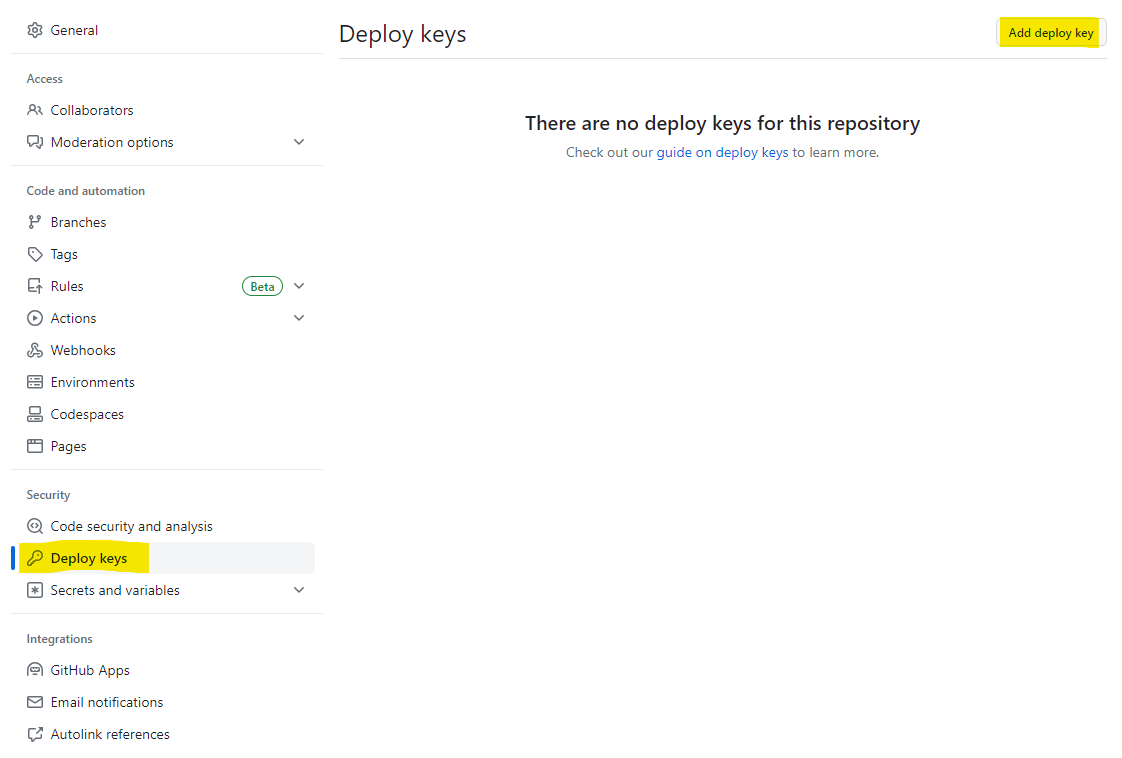
Then click Deploy keys from the side menu and then click Add deploy key.

Paste in your public ssh key and add a relevant title and click Add key

Ensure you leave ‘Allow write access’ un-ticked.
Multiple repositories?
What’s that you say, you have more than one repository, I would be worried if you didn’t. However, what you will initially find is that GitHub will not let you use the same ssh deploy key for a second repo. The solution? Generate a second key, but now you have to manually change between keys when you move between repos, and even more so remember which key is for which.
As always with Linux and git there is an elegant solution, a SSH config file.
Create a ssh config file with the following commands
touch ~/.ssh/config
chmod 600 ~/.ssh/config
Using a command line text editor like vi edit the config file
vi ~/.ssh/configAdd the following configuration information
Host repo-alias
  Hostname github.com
  User git
  IdentityFile /home/<USER-NAME>/.ssh/<KEY-NAME>
What are these fields?
Host: An alias to assign to the corresponding repository (does not need to be the same as the repo name)
Hostname: the hosting service i.e. github.com
User: service using the ssh key (in this case git)
IdentityFile: file path to the ssh key you previously generated
TipWhile the alias you choose doesn’t have to match the repository name, it’s crucial to make it memorable. Using the repository name as the alias is a straightforward and effective approach.
Repeat this process for any other repositories and SSH keys
Now that you have added all your SSH keys along with a corresponding alias you can easily direct git to use the relevant key when working with different repositories.
To do this you insert the alias into the repository address between git@ and :repo-owner-name/repo-name.git
git clone git@<alias>:repo-owner-name/repo-name.git .Once you have cloned a repository and want to run other commands such as git pull all you need to do is include the repo alias and address similar to the clone command.
git pull <alias>:repo-owner-name/repo-nameFor instance, imagine Harry Potter 🧙🔮 maintains a GitHub repository named lumos and wishes to link it to a remote compute instance using the alias pipeline1. In his SSH config file, he would set it up like this:
Host pipeline1
  HostName github.com
  User git
  IdentityFile ~/.ssh/pipeline1_id_ed25519
Now, when he wants to clone the repository, he can simply execute:
git clone git@pipeline1:harrypotter/lumos.git .To fetch updates, he can use:
git pull pipeline1:harrypotter/lumosWith these steps, you have now streamlined your deployment process and ensured the appropriate SSH key can be selected. I hope this guide has been helpful in demystifying the process of deploying private repositories and managing SSH keys.
Happy coding! 🧑💻🔑