![]()
The following assumes you have some level of familiarity with VSCode and WinSCP.
VSCode
Ever thought setting up a VSCode development environment on a remote server that sits behind a jump server or bastion host wasn’t possible (such as an EC2 instance within a private AWS VPC)? 🤔 You wouldn’t be alone, but in fact, you can, and it’s super simple. ✅
VSCode has a feature to connect to remote servers via SSH. This allows you to open a remote folder on the remote machine, integrate the terminal, and take advantage of the full VSCode suite of features, essentially giving you that local interactive development feel. Although VSCode typically expects a direct SSH connection, all you need to do is add the jump server details to the SSH config file.
So, let’s go do that. 👍 Firstly, locate your SSH config file 📄. On Windows, this is usually C:\Users\<user-name>\.ssh\config.
Now you need to add ✌️ two things:
1️⃣ Your jump/bastion server:
Host jump_server
    HostName <public ip address>
    User <username>
    ForwardX11 yes
    ForwardX11Trusted yes
    IdentityFile <path to your ssh key, eg. eg. "~/.ssh/remote_key.pem">
and 2️⃣ Your destination server:
Host destination_server_name
    HostName <private ip address>
    User <username>
    IdentityFile <path to your ssh key, eg. "~/.ssh/remote_key.pem">
ProxyCommand ssh -W %h:%p awsjump_serverThe host names can be anything you want 🔮. Just make sure what you call your ‘jump server’ is the same as what you use in the ProxyCommand for the destination server.
Great, now save and close that config file. ✅
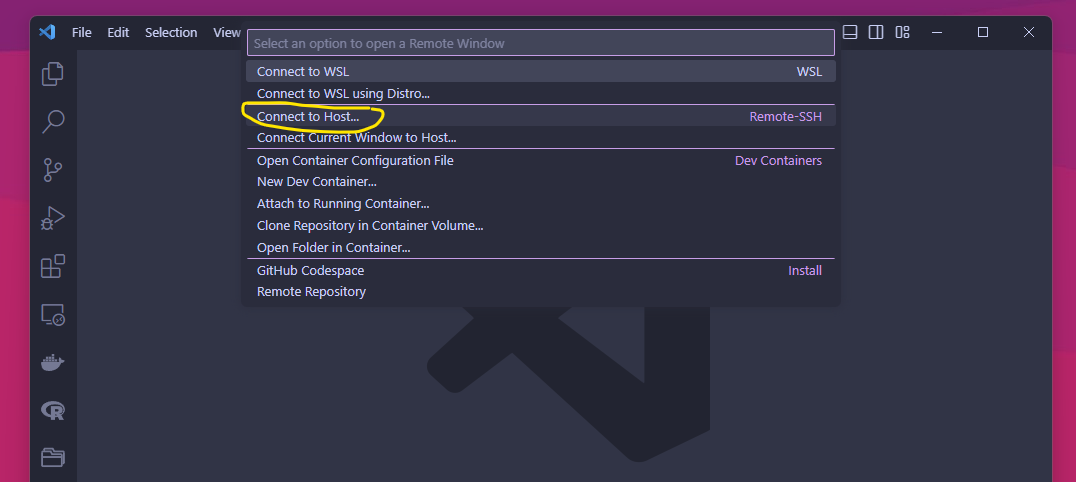
Open VSCode and click 🖱️ the bottom left corner ‘Open a Remote Window’

and select ‘Connect to Host… (Remote-SSH)’ from the dropdown.
You will then be presented with a list of host names configured in your SSH config file. Ignore the jump host and click on the final destination server you want.
VSCode will then prompt you to select the platform of the remote server (Linux, Windows, or macOS). Choose the appropriate option. You will likely get a few options as it makes the connection, such as accepting security certificates, etc. Proceed through all that, and you will (hopefully 🤞) finally end up connected to your remote private server.
This assumes all other security settings, such as connecting IP range restrictions, have been set up accordingly. If you can already SSH into your jump server and private server via the command line, then you should be good to go.
VSCode does use a chunk of resources, so if you try to run this on a remote instance with limited RAM, it will likely eat itself and come to a crumbling halt.
WinSCP
If you are coming from a Windows environment, a likely scenario is you will also want to use WinSCP for file transfers to and from your remote private server. Again, this can be set up to tunnel through your jump/bastion host.
Open WinSCP and add a new site. Keep the file protocol as SFTP. In Host name, enter the final destination IP address (💬 yes, I know the final destination is likely a meaningless local IP address, but trust me, it’s all good; the jump host will sort all that out). Add your User name. The password can typically be left blank as you will be using an SSH key.
Now click Advanced, and under Connection, click Tunnel, and tick Connect through SSH tunnel.
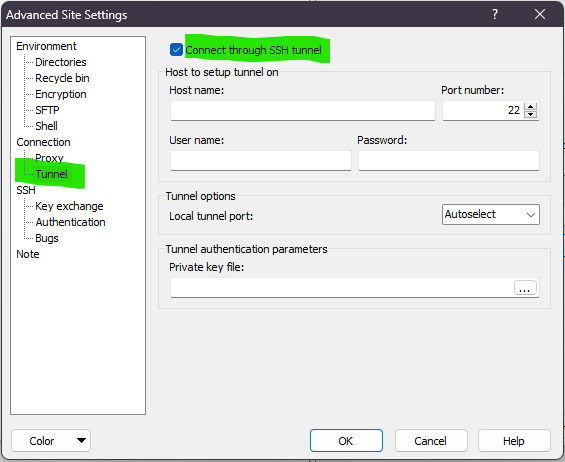
Here is where you add your jump host’s public IP address under Host name, again along with your User name. Now, under Private key file, you need to add your SSH key, but like most things, this isn’t straightforward. You first need to convert it to PuTTY .ppk format. Rather than reinventing the wheel, here is a good walkthrough on how to do this 👉 Convert PEM to PPK.
Once you have added your .ppk key and saved the new site, you should be good to go.
Please shout out if you notice anything different when setting this up yourself. I wrote this guide after having mine set up for some time, so I may have missed some bits.